This article is part of the Rehband ‘Carry Yourself’ series, a complete guide to improving your upper body strength. The text includes 6 handstand progressions that will improve your upper body strength and ultimately help you carry yourself through life.
The handstand push up is an important gymnastic movement that often crops up in WODs. It can seem daunting when you first begin, as you have to have confidence in your strength, balance and ability to control your body when upside down.
Once you become more confident, and master the basics, then the handstand push up becomes a great exercise for:
- Building impressive upper body
- Core strength
- Agility
- Coordination
- Power
https://www.instagram.com/p/BaHP2o6j-6B/?hl=en&taken-by=rehband
But first, let’s start with the basic technique – hand positioning.
Place your hands about a foot away from the wall. Too close and the movement becomes harder to coordinate and easier to fall off balance. Too far away and you will put your body in an inefficient position to perform the full range of motion. In competition, you may be forced to have your hands in particular positions, so it is worth practicing with your hands very close to the wall. This makes the exercise much harder, but it will also make you stronger and more coordinated.
If you are having difficulties, point your thumbs inwards towards the wall. This will help to place greater load on the triceps, and will take some of the pressure away from your shoulders.
Wrist protection and elbow sleeves can be highly valuable for this drill as they will help to support the movement and strengthen your joints as your body gets more familiar with the whole range of motion.
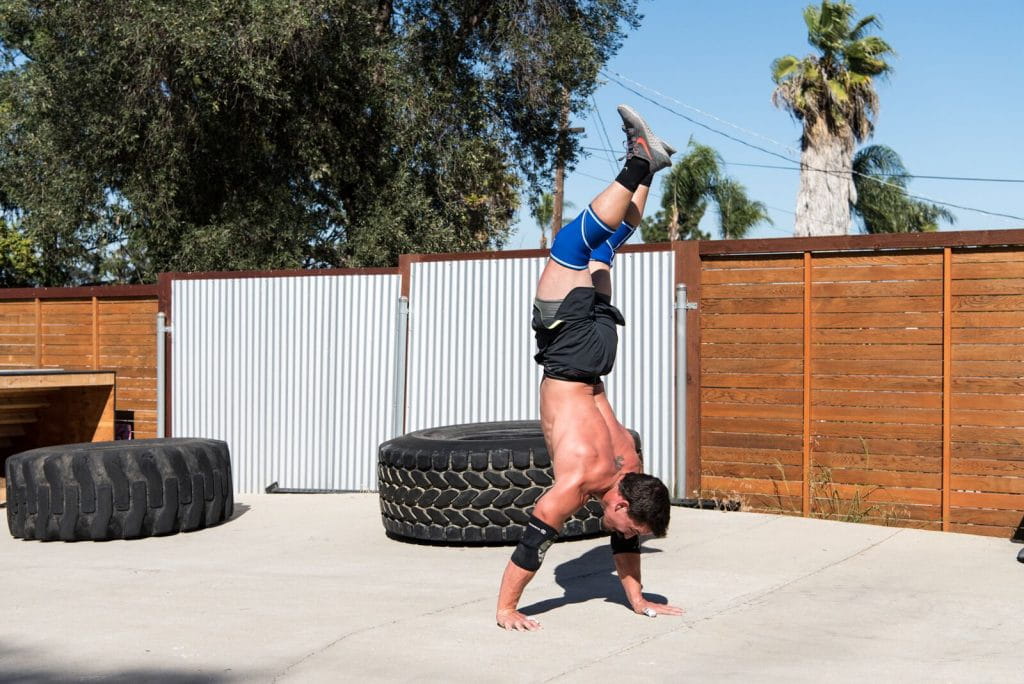
Handstand push ups will significantly improve your upper body strength and this is transferable to many other exercises. Check out Annie Thorisdottir below.
https://www.instagram.com/p/BckRfIGFfRO/?hl=en&taken-by=rehband
1. KIPPING VS STRICT
The handstand push up can be performed, like pull ups, in a strict or kipping movement depending on the standards of the workout. As with all CrossFit® exercises, concentrate on the strict version first. Build the necessary skill and strength that is required for the harder version before you even start to think about kipping.
Once you have mastered the handstand push up then you can get more ambitious, like Josh Bridges…
2. PIKE PUSH UP
Start in a regular push up position. Walk your feet forwards so that your bum raises up into the air and your body resembles an inverted V. Whilst keeping your core tight, spine neutral and legs straight, perform a press up by lowering your head to touch the floor then fully extend your arms once again to complete one rep.
3. PIKE PUSH UP WITH ELEVATED FEET
This is the same as the previous exercise, however place your feet on a plyo box so that more pressure is placed on your torso, shoulders and arms. Perform reps as above.
4. KICK UP AND HOLD
Position your hands in the starting position. Lead with one leg and jump off the standing leg as you propel your feet toward the wall. It may take a few kicks to stick. Do not be afraid to overshoot it at first. The wall is there to catch you. Compression arm sleeves are a helpful way to increase your sense of control and proprioception.
Once you are in the handstand position, spread your fingers and control the weight of your body. Start by holding this position with as little movement as possible. Once you can manage 30 seconds then it is time to move onto the next scaled exercise.
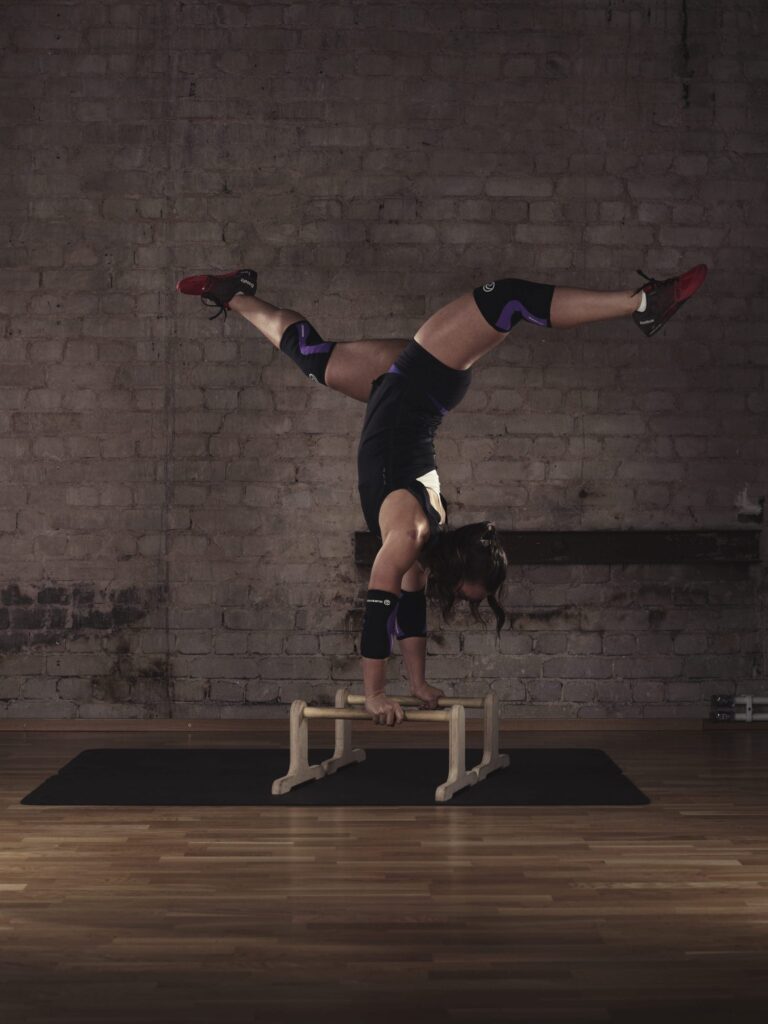
Camille Leblanc Bazinet demonstrating her strength and balance
5. NEGATIVE HANDSTAND PUSH UPS
Once you feel confident with these scaled options, try a negative handstand push up to get your body used to kicking up into the starting position and being controlled whilst upside down.
- Kick up into the starting position with confidence.
- Propel your legs with force and support the weight of your body on your hands.
- Gradually lower yourself downwards until the top of your head touches the floor. Stay in control of the movement.
- Kick back out of the handstand position
6. PARTIAL RANGE OF MOTION HANDSTAND PUSH UP
For this version, prop an ab mat on a book or plate in order to reduce the full range of motion of the exercise. This will allow you to build up over time and get used to the feel of pushing your body upwards and balancing at the same time.