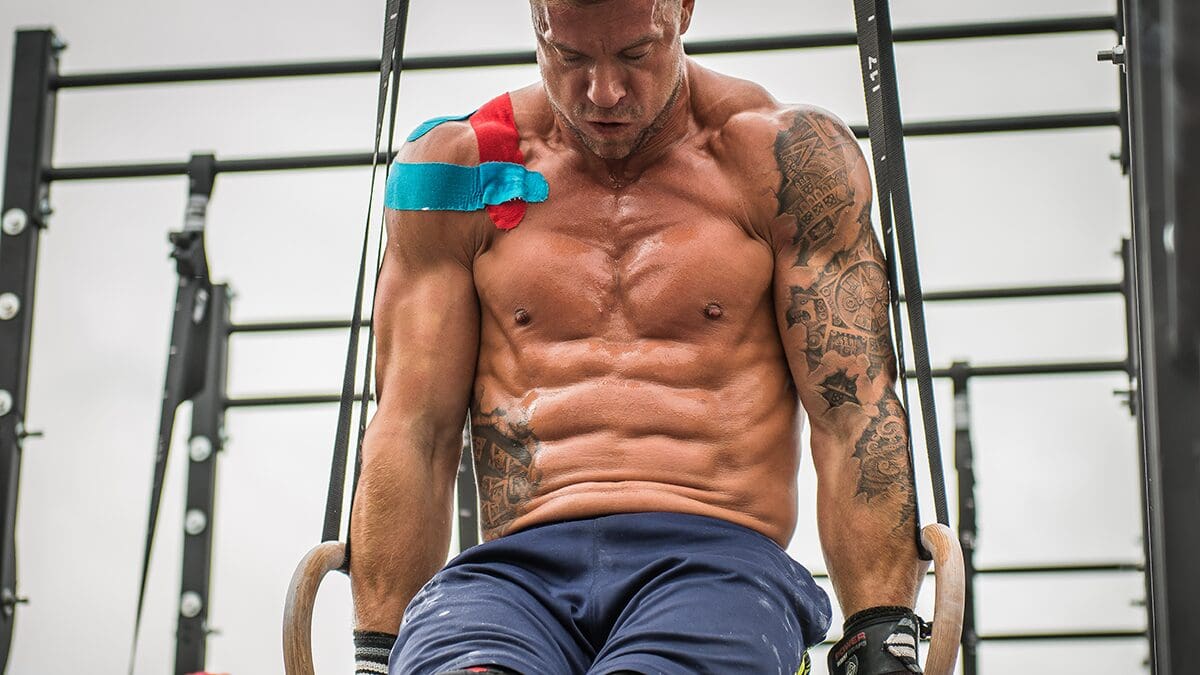
In the realm of physical fitness, the core is often hailed as the foundation of strength and stability.
It serves as the central support system for the entire body, connecting the upper and lower halves while facilitating efficient movement and balance.
A strong core is not only aesthetically pleasing with the promise of a chiseled six-pack, but it also plays a pivotal role in preventing injuries, enhancing posture, and improving overall athletic performance.
Isometric Abs Exercises: What Are They?
Isometric ab exercises are a category of core-strengthening workouts that focus on contracting and holding specific muscle groups without significant movement.
Unlike traditional exercises that involve repetitive motions, isometric exercises require you to maintain a static position for a set duration, thereby isolating and intensively engaging your core muscles. These exercises are not only effective but also low-impact, making them accessible to individuals of various fitness levels.
Benefits of Isometric Abs Exercises
Isometric abs exercises offer a myriad of benefits beyond merely sculpting a six-pack. Some of the key advantages include:
- Core Strength: Isometric exercises target deep core muscles, such as the transverse abdominis and obliques, leading to improved core strength and stability.
- Injury Prevention: A strong core provides essential support for the spine and reduces the risk of back injuries and strains.
- Improved Posture: Strengthening the core helps maintain proper posture, reducing the likelihood of slouching or developing poor alignment.
- Enhanced Athletic Performance: A stable core enhances power and control in various sports and physical activities, from running and weightlifting to yoga and dance.
- Functional Strength: Isometric exercises simulate real-world scenarios where core stability is crucial, translating into better functionality in daily tasks.
- Time Efficiency: Isometric exercises can be performed quickly and effectively, making them an excellent addition to time-constrained workout routines.
- Reduced Strain: Unlike dynamic exercises that may strain joints, isometric exercises minimize joint impact, making them suitable for those with joint issues.
In this article, we will explore five isometric abs exercises that can help you achieve a strong, sculpted core while safeguarding against injuries and enhancing your overall well-being.
Exercise 1: Plank
The plank is a fundamental isometric ab exercise that targets multiple core muscles simultaneously. To perform a plank correctly, follow these guidelines:
Starting Position: Begin in a push-up position with your hands directly under your shoulders and your body in a straight line from head to heels.
Engage Core Muscles: Tighten your abdominal muscles and glutes to maintain a neutral spine. Avoid arching your lower back or letting your hips sag.
Neutral Neck: Keep your neck in line with your spine, gazing at a point on the floor to prevent straining your neck.
Hold Steady: Maintain this position for as long as you can while breathing steadily. Aim for at least 20-30 seconds when starting.
Variations and Progressions
Once you’ve mastered the basic plank, you can challenge yourself with various plank variations and progressions to intensify your core workout:
Forearm Plank: Instead of being on your hands, rest on your forearms for added stability and a different wrist position.
Side Plank: Shift your weight to one side, supporting your body on one forearm, and raise your opposite arm to the ceiling. This variation targets your obliques.
Plank with Leg Lift: While in a standard plank, lift one leg a few inches off the ground and hold it, alternating between legs.
Plank with Shoulder Taps: In the plank position, touch your opposite hand to your opposite shoulder, alternating sides.
Extended Plank: Place your feet on an elevated surface like a stability ball or step to increase the difficulty.
Plank with Knee to Elbow: From a plank position, bring your right knee toward your right elbow, then switch sides.
Common Mistakes to Avoid
To maximize the benefits of the plank and reduce the risk of injury, be aware of these common mistakes:
Sagging Hips: Maintain a straight line from head to heels. Avoid letting your hips drop or pike upwards.
Holding Your Breath: Don’t forget to breathe. Inhale and exhale rhythmically to prevent tension and dizziness.
Overarching the Lower Back: Keep your lower back neutral; avoid arching it excessively, which can strain the lumbar spine.
Incorrect Hand Placement: Ensure your hands are directly under your shoulders, distributing your weight evenly.
Neglecting Alignment: Keep your head in line with your spine. Avoid looking up or letting your head hang.
Losing Core Engagement: Continuously engage your core muscles throughout the plank. Don’t relax your abs.
Incorporate proper plank form, explore variations, and steer clear of these mistakes to build a solid core foundation and enhance your overall fitness level.
Exercise 2: Side Plank
The side plank is an excellent isometric exercise for targeting the obliques and improving lateral core stability. To execute a side plank with proper form:
- Starting Position: Lie on your side with your legs extended and feet stacked on top of each other. Place your elbow directly beneath your shoulder.
- Engage Core Muscles: Lift your hips off the ground, creating a straight line from head to heels. Keep your core tight to prevent your hips from sagging.
- Supportive Arm: Your bottom arm should be bent at a 90-degree angle, with your forearm on the ground, providing support.
- Head and Neck Position: Align your head with your spine, looking straight ahead or slightly upward.
- Hold Steady: Maintain this position for as long as you can, breathing steadily. Begin with shorter durations and work your way up as you progress.
Advanced Side Plank Variations
Once you’ve mastered the basic side plank, you can challenge yourself further with advanced variations:
Extended Arm Side Plank: Instead of resting on your forearm, fully extend your supporting arm, lifting your torso off the ground.
Side Plank with Leg Lift: While in a side plank, raise your top leg as high as you can without compromising your form.
Side Plank with Hip Dips: Slowly lower your hip toward the ground and then lift it back up. This variation adds dynamic movement to the exercise.
Thread the Needle: In a side plank position, reach your top arm underneath your body, threading it through the space between your torso and the ground. This engages your obliques even more.
Tips for Injury Prevention
To ensure safety and reduce the risk of injury while performing side planks:
Maintain Proper Alignment: Focus on keeping your body in a straight line from head to heels. Avoid bending at the waist or letting your hips drop.
Even Weight Distribution: Distribute your weight evenly between your supporting elbow or hand and your feet to prevent overloading any joint.
Breathing: Remember to breathe steadily throughout the exercise. Holding your breath can increase tension and affect your stability.
Progress Gradually: Don’t rush into advanced variations. Gradually increase the intensity as your core strength improves to avoid straining your muscles.
Monitor Shoulder and Wrist Comfort: If you experience discomfort in your supporting shoulder or wrist, consider modifying the exercise or using a cushioned surface for support.
Incorporate side planks into your core routine to build strong oblique muscles and lateral stability. With proper form and gradual progression, you’ll develop a robust core while minimizing the risk of injuries.
Exercise 3: Superman
The Superman exercise is a superb isometric movement for strengthening the lower back, glutes, and upper back muscles.
To perform the Superman exercise with correct technique:
Starting Position: Begin by lying face down on the floor, with your arms extended straight in front of you and your legs fully extended.
Engage Core Muscles: Begin by tightening your core muscles and pressing your hips into the floor to stabilize your lower back.
Lift Arms and Legs: Simultaneously raise your arms and legs off the ground, creating a slight arch in your back. Imagine you’re trying to stretch your body as long as possible.
Maintain Neck Alignment: Keep your head in a neutral position in line with your spine, looking down at the floor.
Hold Position: Hold the lifted position for a few seconds, focusing on engaging your back muscles.
Modifications and Challenges
The Superman exercise can be modified to suit your fitness level or made more challenging as you progress:
Beginner Variation: Start with only the upper body lift (arms and chest) or lower body lift (legs) before attempting both simultaneously.
Single-Leg Superman: Lift one arm and the opposite leg at a time for added balance and control.
Extended Hold: Increase the duration of your hold as you become more comfortable with the exercise.
Weighted Superman: Hold a light dumbbell in your hands or place an ankle weight on your ankles to add resistance.
Superman with a Twist: Lift your arms and legs as usual but add a rotation by moving your arms to the sides and legs out to the sides at the top of the movement.
Maintaining Proper Alignment
To ensure safety and effectiveness during the Superman exercise, focus on maintaining proper alignment:
- Neutral Spine: Keep your spine in a neutral position throughout the exercise. Avoid over-arching or rounding your back excessively.
- Controlled Movement: Lift your arms and legs slowly and in a controlled manner. Avoid jerky or sudden movements that could strain your back.
- Breathing: Breathe normally while holding the Superman position. Holding your breath can lead to tension and discomfort.
- Avoid Hyperextension: While it’s important to lift your limbs, avoid hyperextending your joints. Keep a slight bend in your elbows and knees.
Comfortable Range of Motion: Lift your arms and legs to a height that feels comfortable and maintainable. You don’t need to lift them excessively high.
Incorporate the Superman exercise into your core routine to strengthen your back and improve overall posture. By following proper technique and adjusting the difficulty level as needed, you can experience the benefits of this exercise safely and effectively.
Exercise 4: Hollow Body Hold
The hollow body hold is a powerful isometric exercise that targets the entire core, including the upper and lower abs, as well as the lower back.
To perform the hollow body hold correctly:
- Starting Position: Lie flat on your back with your arms extended overhead and your legs straight.
- Engage Core Muscles: Begin by pressing your lower back into the floor to engage your core muscles. Your lower back should be in contact with the ground throughout the exercise.
- Lift Head and Shoulders: Raise your head, shoulders, and upper back off the ground, reaching your arms toward your toes. Keep your chin tucked slightly to maintain proper neck alignment.
- Lift Legs: Simultaneously, lift your legs off the ground a few inches, keeping them straight and close to the floor.
- Hold Position: Maintain the hollow body position, forming a slight curve in your body like a hollowed-out canoe. Focus on breathing steadily and holding the position for the desired duration.
Increasing Difficulty Safely
To progress with the hollow body hold and make it more challenging while ensuring safety:
Leg Raise Variation: Gradually increase the height at which you lift your legs. Start by lifting them higher until they are perpendicular to the floor.
Arm Position: Extend your arms closer to your feet for added leverage and difficulty.
Rocking Hollow Hold: While maintaining the hollow body position, gently rock forward and backward without losing your form. This adds dynamic movement and further engages your core.
Weighted Hollow Hold: Hold a light dumbbell or a weighted object with your hands to increase resistance.
Hollow Body Flutter Kicks: Add flutter kicks (alternating leg lifts) while maintaining the hollow body position. This adds dynamic movement and intensifies the workout.
Engaging Muscles Effectively
To engage your muscles effectively and maximize the benefits of the hollow body hold:
Constant Core Activation: Keep your core muscles engaged throughout the entire exercise to support your lower back and maintain proper form.
Breathe Steadily: Focus on controlled breathing. Inhale and exhale rhythmically to prevent breath-holding, which can lead to tension.
Maintain Lower Back Contact: Ensure your lower back stays in contact with the floor. If it lifts, it indicates loss of core engagement.
Proper Neck Alignment: Keep your head and neck aligned with your spine, avoiding excessive strain on your neck muscles.
Progress Gradually: Start with shorter hold durations and gradually increase them as your core strength improves. Prioritize form over duration.
The hollow body hold is a challenging yet highly effective exercise for building core strength and stability. By executing it with proper form, safely increasing the difficulty, and focusing on muscle engagement, you can make significant strides in strengthening your core muscles.
Exercise 5: Dead Bug
The Dead Bug exercise is a core-strengthening exercise that targets the abdominal muscles while promoting stability. To perform the Dead Bug exercise correctly:
- Starting Position: Lie on your back with your arms extended toward the ceiling, perpendicular to the floor. Bend your knees at a 90-degree angle, lifting your feet off the ground.
- Engage Core: Tighten your abdominal muscles to press your lower back into the floor. This ensures your core is engaged and stable.
- Movement: Simultaneously lower your right arm and left leg toward the ground, maintaining a 90-degree bend in your knee and elbow. Your lower back should remain in contact with the floor.
- Return to Starting Position: Slowly return your arm and leg to the starting position, keeping them hovering above the ground without touching it.
- Alternate Sides: Repeat the movement with your left arm and right leg, lowering them while maintaining core engagement and the 90-degree bends in your limbs.
- Breathing: Exhale as you extend your arm and leg, and inhale as you return to the starting position. Focus on controlled breathing throughout.
Progressions for Added Intensity
To increase the intensity of the Dead Bug exercise as you become more proficient:
Extended Leg Dead Bug: Instead of keeping your knee bent at 90 degrees, fully extend your leg as you lower it. This increases the lever arm, making the exercise more challenging.
Weighted Dead Bug: Hold a light dumbbell or resistance band in your hands to add resistance and intensify the exercise.
Slow Tempo: Perform the Dead Bug exercise at a slower tempo, emphasizing control and muscle engagement.
Single-Arm and Single-Leg Variation: Challenge your stability further by performing the exercise with just one arm or one leg at a time while keeping the other limb extended.
Alternating Hand and Foot Patterns: Create coordination challenges by alternating between different arm and leg movements, such as opposite arm and leg extensions.
Avoiding Common Mistakes
To maintain proper form and avoid common mistakes while performing the Dead Bug exercise:
- Controlled Movement: Ensure all movements are controlled and deliberate. Avoid using momentum to swing your limbs.
- Maintain Core Engagement: Keep your core muscles engaged throughout the exercise to protect your lower back and enhance effectiveness.
- Proper Breathing: Focus on rhythmic breathing to prevent breath-holding, which can lead to tension and instability.
- Avoid Arching Your Lower Back: Keep your lower back pressed into the floor at all times. If you notice your back arching, regress to a less challenging variation.
- Start Slowly: Begin with a shorter range of motion and progress to more extended movements as you build strength and control.
Incorporate the Dead Bug exercise into your core routine to strengthen your abdominal muscles, enhance stability, and improve overall core function. By following the exercise instructions, exploring progressions, and avoiding common mistakes, you can maximize the benefits of this effective core workout.
Incorporating Isometric Abs Exercises into Your Routine
When integrating isometric abs exercises into your fitness routine, it’s essential to establish the right frequency and duration:
- Frequency: Aim to perform isometric abs exercises 2 to 3 times per week. This frequency allows your muscles to recover while still challenging your core regularly.
- Duration: Start with shorter durations (e.g., 20-30 seconds per set) and gradually increase them as your core strength improves. Aim for 3 to 5 sets per exercise, with adequate rest between sets.
- Rest: Ensure you allow sufficient rest between workout sessions to prevent overtraining and muscle fatigue. One to two days of rest between core workouts is ideal.
Balancing Isometric Exercises with Dynamic Movements
While isometric exercises are highly effective for building core strength and stability, it’s important to strike a balance by incorporating dynamic movements:
Dynamic Exercises: Include dynamic core exercises such as crunches, leg raises, Russian twists, and bicycle crunches to engage your core through a full range of motion and promote functional strength.
Cardiovascular Training: Cardiovascular activities like running, swimming, or cycling engage your core while improving overall fitness and calorie burn.
Strength Training: Compound movements like squats and deadlifts engage your core as stabilizers. Integrating these exercises into your routine complements your core-specific work.
Flexibility Training: Regular stretching or yoga sessions can help maintain flexibility in your core muscles, preventing stiffness and enhancing overall mobility.
Creating a Well-Rounded Core Workout
To create a well-rounded core workout routine that incorporates isometric exercises effectively:
Variety: Include a mix of isometric exercises like planks, side planks, hollow body holds, and Dead Bug, targeting different areas of your core.
Progression: As your strength improves, progressively increase the intensity and difficulty of your isometric exercises by incorporating variations and adding resistance.
Warm-up: Prior to your core workout, engage in a brief warm-up to prepare your muscles and prevent injury. Incorporate dynamic stretches and light cardiovascular activity.
Cool-down: After your core workout, perform static stretches to improve flexibility and aid in muscle recovery.
Proper Form: Maintain correct form throughout your exercises, as poor form can lead to injury and decreased effectiveness.
Rest and Recovery: Allow your core muscles adequate time to recover between workouts, ensuring you don’t overexert yourself.
Consult a Professional: If you’re new to core training or have any pre-existing medical conditions, consider consulting a fitness professional or physical therapist for guidance.
By implementing isometric abs exercises alongside dynamic movements and following a well-structured routine, you can achieve a strong, balanced, and injury-resistant core that supports your overall fitness goals.
Safety and Injury Prevention Tips
Prioritizing safety and injury prevention during your core workouts is paramount.
Here’s how to do it:
Pay Attention to Discomfort: While it’s normal to feel some muscle fatigue during core exercises, stop immediately if you experience sharp pain, discomfort in joints, or any unusual sensations. These could be signs of overexertion or incorrect form.
Progress Gradually: Avoid rushing into advanced exercises or heavy resistance. Progress at a pace that suits your fitness level and allows your muscles to adapt safely.
Rest as Needed: Don’t push through pain or excessive fatigue. Take breaks as needed, and don’t hesitate to skip or modify an exercise if it doesn’t feel right.
Stay Hydrated: Dehydration can affect muscle function and increase the risk of injury. Ensure you’re adequately hydrated before and during your workouts.
Proper Warm-up and Cool-down
A thorough warm-up and cool-down routine can significantly reduce the risk of injury:
Warm-up:
Dynamic Stretches: Start with dynamic stretches like leg swings, arm circles, and hip rotations to increase blood flow to your muscles.
Light Cardio: Engage in 5-10 minutes of light cardiovascular exercise, such as jogging or jumping jacks, to elevate your heart rate and prepare your body for activity.
Activation Exercises: Perform activation exercises that specifically target your core muscles to ensure they are engaged and ready for the workout ahead.
Cool-down:
Static Stretches: After your core workout, spend time on static stretches for your core and other major muscle groups to improve flexibility and prevent muscle soreness.
Deep Breathing: Practice deep, slow breathing to help your body relax and recover.
Hydrate: Rehydrate your body by drinking water or a sports drink containing electrolytes to replenish lost fluids.
Seeking Professional Guidance
If you’re new to core training or have any concerns about your fitness level or pre-existing conditions, consider seeking professional guidance:
Consult a Trainer: Working with a certified fitness trainer can ensure you learn proper form and receive personalized guidance on designing a safe and effective core workout routine.
Physical Therapist: If you have a history of back pain, injuries, or specific medical conditions, consult with a physical therapist who can provide tailored exercises and recommendations for your unique needs.
Medical Evaluation: If you have any underlying health issues or are recovering from surgery, consult your healthcare provider before starting any new exercise program.
Regular Check-ins: Periodically assess your progress and any changes in your body. Adjust your workout routine as needed to accommodate your evolving fitness level and goals.
Remember that safety should always come first in your fitness journey. By listening to your body, incorporating proper warm-up and cool-down routines, and seeking professional guidance when necessary, you can minimize the risk of injury and enjoy the long-term benefits of a strong, resilient core.
Conclusion
A strong, defined six-pack and an injury-proof core are attainable goals for anyone willing to put in the effort and follow a well-structured fitness regimen.
What Happens If You Eat ZERO Carbs and Sugar for 1 Week?
The Easiest Way to Get Lean (From 30% to 10% Body Fat)
7 Best Exercises for a Stronger Back
Isometric abs exercises have proven to be an invaluable tool on this journey, offering not only aesthetic benefits but also enhanced core strength, injury prevention, and improved overall fitness.
Consistency and Patience
The path to a chiseled six-pack and a resilient core requires consistency and patience. Rome wasn’t built in a day, and neither is a strong core. Stick to your core workout routine, gradually increase intensity, and embrace the journey. Results will come with dedication over time.
Embracing the Power of Isometric Abs Exercises
Isometric abs exercises are the secret weapon in your core-training arsenal. Planks, side planks, hollow body holds, Dead Bug exercises, and more offer a holistic approach to core development.
These exercises engage deep core muscles, enhance stability, and safeguard against injuries.
By incorporating these isometric exercises into your fitness routine, listening to your body, warming up and cooling down effectively, and seeking professional guidance when needed, you can unlock the full potential of your core.
Not only will you achieve the coveted six-pack, but you’ll also cultivate a core that supports you in every aspect of your active life, ensuring you stand tall and strong, free from the shackles of injury.