Due to its athletic, mental and technical demands, Olympic weightlifting is considered to be one of the most admirable sports. The Clean and Jerk is a cornerstone of this discipline and features heavily within CrossFit.
What makes this sport even more unique is the fact that competitors train for years just for a few seconds of performance: 3 attempts for each lift. Although it`s about moving a huge amount of weight, Olympic weightlifting still appears to look graceful when done to perfection. In CrossFit, the Clean and Jerk is a cornerstone Barbell exercise that demands your time and dedication.
The Clean and jerk consists of two parts: clean – from the ground to shoulders, and jerk – from shoulders to above the head.
Part 1. Clean
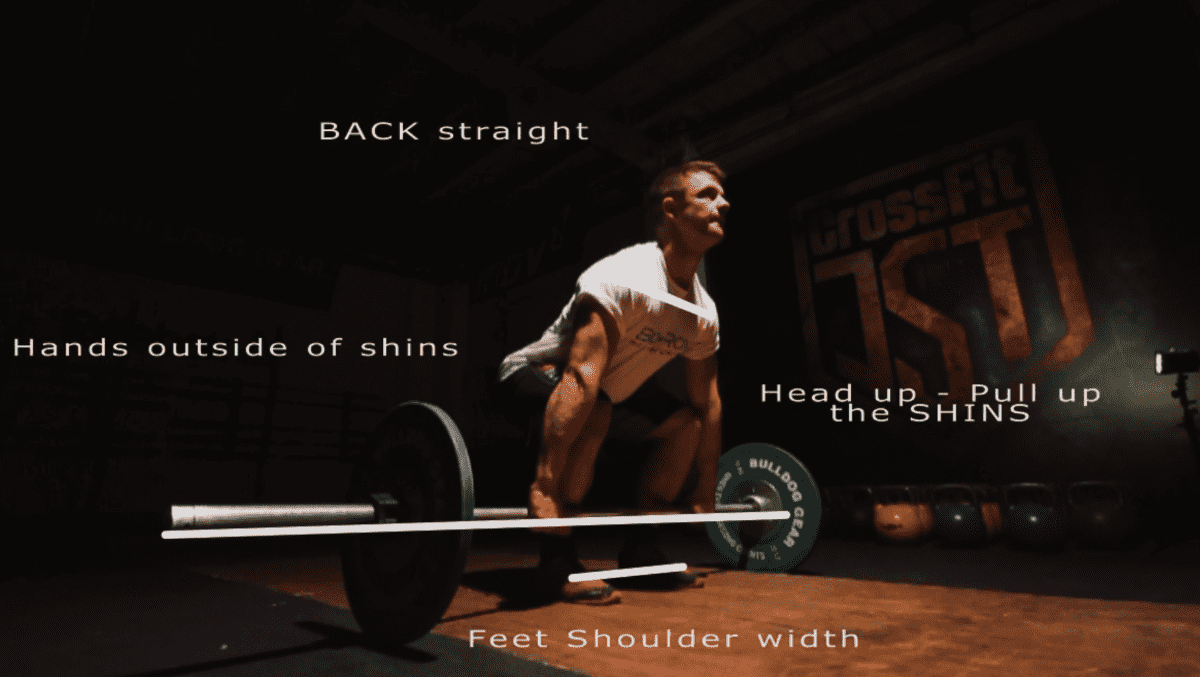
1. Position your feet in a shoulder width. Grab the bar just past the shoulder width. Keep your back straight.
2. Align the bar over the balls of your toes. Drop your hips so your shoulders are directly above the barbell. Engage core. Pull your head up, look straight ahead and keep your arms straight.
3. Start lifting the barbell. Push the feet against the floor. Keep your core engaged. As the barbell passes the knees, pull it back towards your legs. Stay connected to it, keep it close to the body. Keep your arms straight and midline tight.
4. Lift starts slowly and accelerates (after it passes the knees) into a quick, explosive movement and full-body extension.
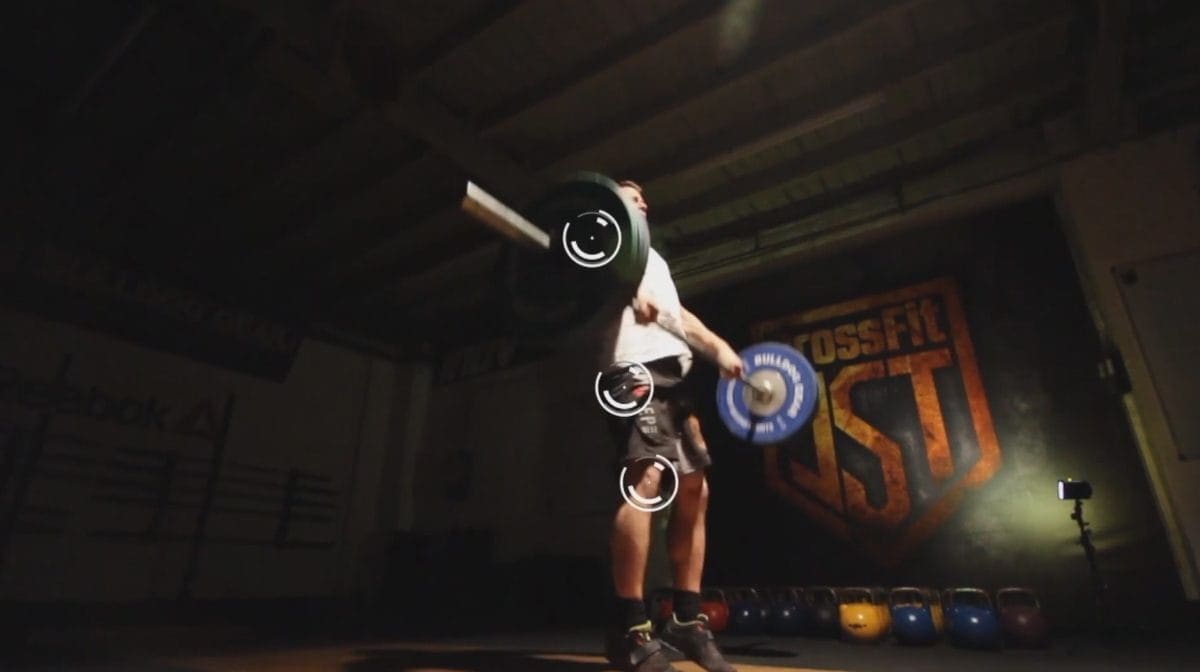
5. When you lift the barbell to the mid/upper tight, explosively extend your hips. Shrug your shoulders, elbows should be bend outward. Aim to keep the bar close to the body as much as possible. Your goal should be a full hip extension.
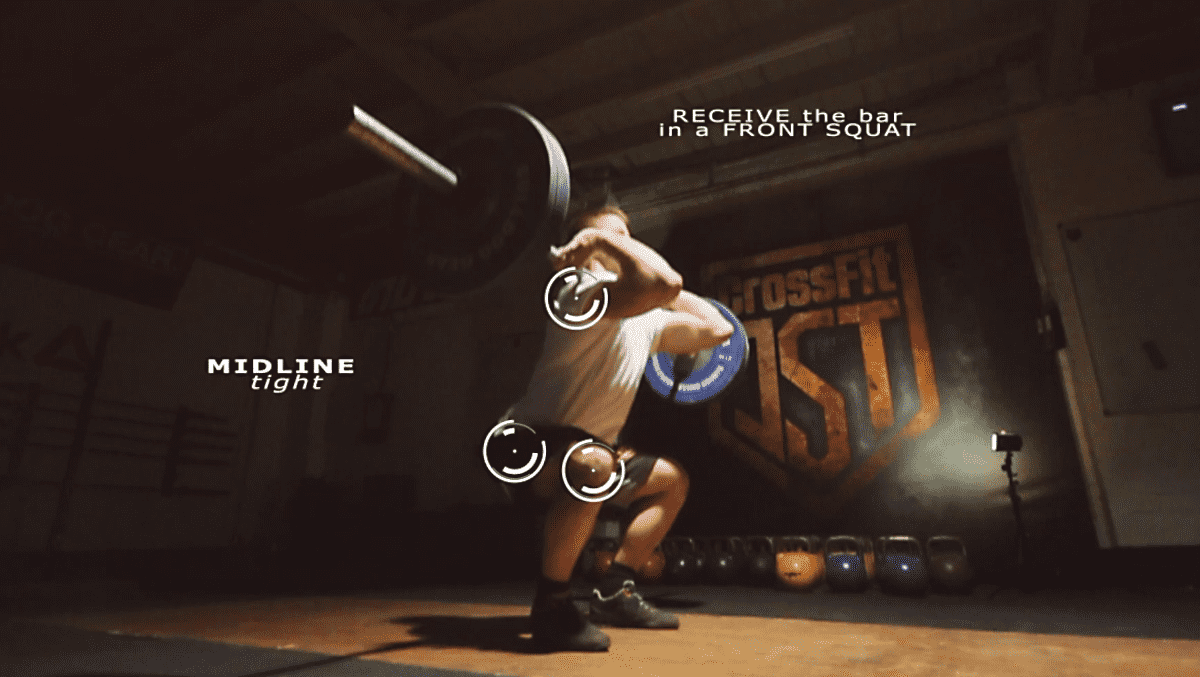
6. Shrug your shoulders, pull your body underneath into the front squat position to receive the bar on your shoulders. Lift your elbows up, push your shoulder forwards and slightly up. Stand up.
Part 2. Jerk
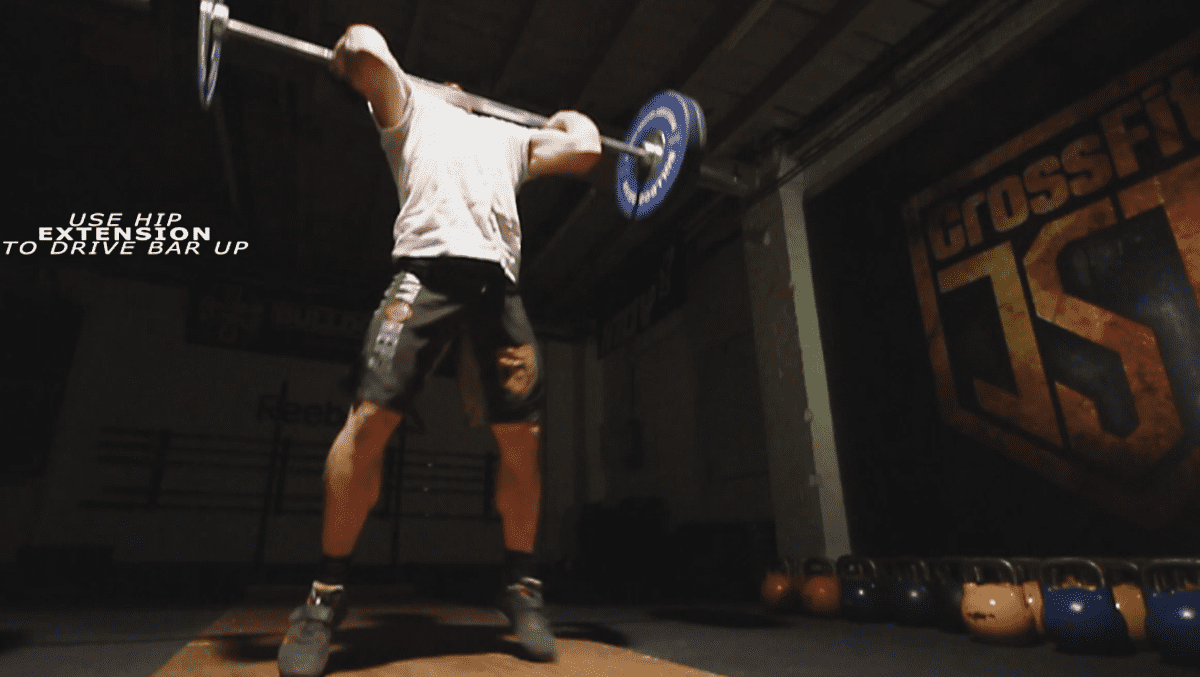
7. After standing up from the front squat, adjust the barbell into the jerk rack position. Recover, breathe and align your balance towards the heels. Bend in your knees and hips, keep your torso straight. Explosively extend and drive from the ground to thrust the bar upwards above the head.
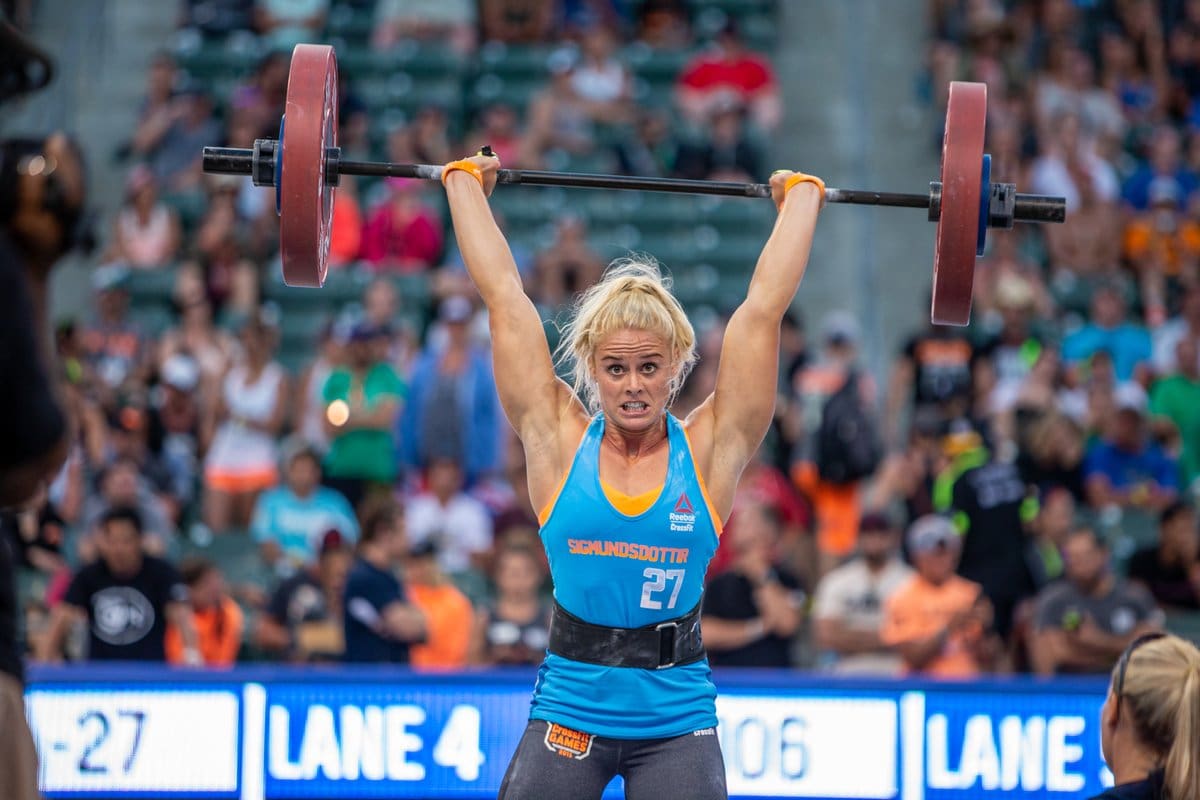
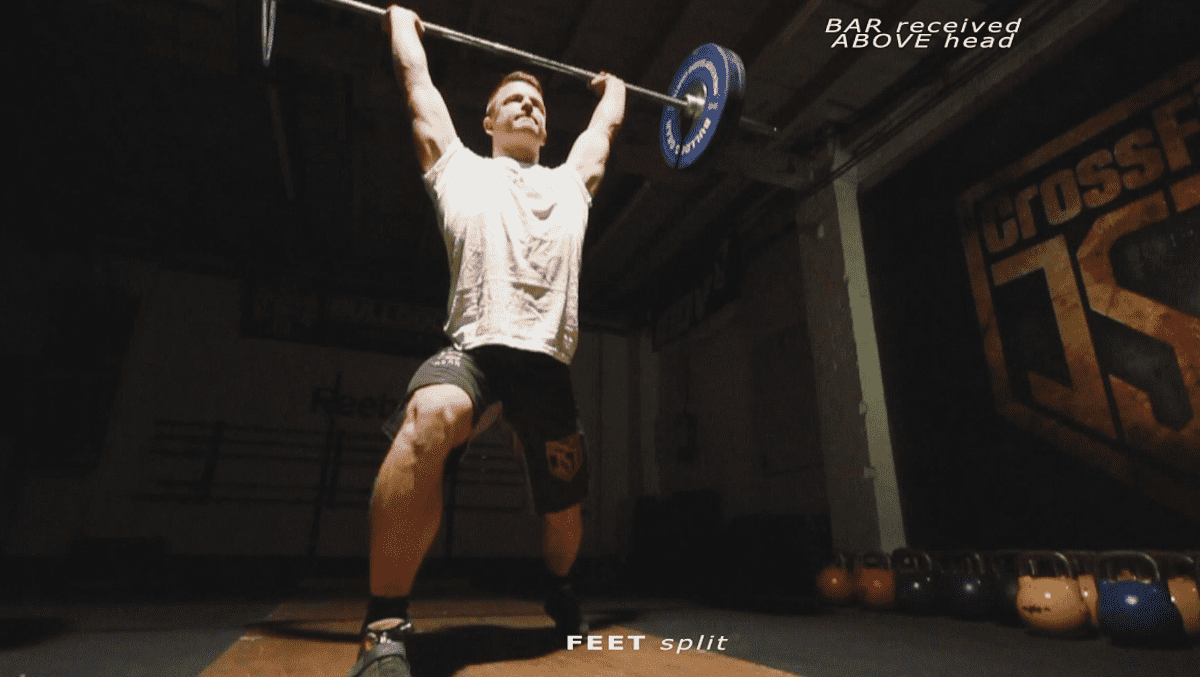
8. Feet split, elbows are locked, core is engaged and the bar is received overhead. Recover to a full standing position.
How do you compare?
World records in Clean and Jerk
Men:
Om Yun-chol, North Korea (-56 kg), 170 kg
Le Maosheng, China (-62 kg), 182 kg
Liao Hui, China (-69 kg), 198 kg
Oleg Perepetchenov, Russia (- 77 kg), 210 kg
Zhang Yong, China (-85 kg), 218 kg
Ilya Ilyin, Kazakhstan (-94 kg), 233 kg
David Bedzhanyan, Russia (-105 kg), 238 kg
Hossein Rezazadeh, Iran (+105 kg), 263 kg
Women:
Nurcan Taylan, Turkey (-48 kg), 121 kg
Zulfiya Chinshanlo, Kazahstan (-53 kg), 132 kg
Qiu Hongmei, China (-58 kg), 141 kg
Lin Tzu-chi, Chinese Taipei (-63 kg), 145 kg
Liu Chunhong, China (-69 kg), 158 kg
Kim Un-ju, North Korea (-75 kg), 164 kg
Zhou Lulu, China (+75 kg), 192 kg
Sources:
1. Clean and snatch infographic, J. Böttcher, E. Deutscher
2. 12 step guide to a flawless clean, Greg Everett (Catalyst athletics), T-nation, 2010
3. List of world records in Olympic weightlifting, Wikipedia
This article is part of the Rehband Carry Yourself series, a complete guide to improving your upper body strength, mobility, posture and health..
This article will teach you everything you need to know about the Clean Technique. It will help you to improve your skills, make you more resistant to injury and ultimately give you a stronger upper body allowing you to become a better athlete and more accomplished lifter. It will also give you helpful tips and inspiration from top CrossFit and Rehband athletes Annie Thorisdottir, Rich Froning and USA Weightlifter Mattie Rogers.
CLEAN TECHNIQUE
1. GET THE BEST RACK POSITION YOU CAN
A strong rack position improves your chances of standing up out of a heavy clean. It is common for beginners to struggle with the position as people often have incredibly tight lats and triceps. Rolling the lats, triceps and wrists and stretching them during your warm-up will help get those elbows higher and the bar comfortably resting on the shoulders whilst gripping the bar.
Stretching out using the bar is also a fantastic way to improve the front rack position. Place the barbell into the back squat position, and use the weight of the bar to rotate one elbow up at a time whilst keeping the hands on the bar and the body straight.
If you have to sacrifice gripping the bar in the rack position to have your elbows up, sacrifice the grip and open your hands.
2. GOOD POSTURE EQUALS A BETTER CLEAN
Having a tight mid-back from all those hours racked up at the desk can be a complete hindrance to a strong clean. Catching a clean with a rounded mid-back will force the elbows down and cause you to grind-up the squat which can zap away your energy and put unnecessary pressure onto the wrists –a one-way ticket to injury. Rehband wrist protection are a useful addition here, especially when you are first learning to clean.
In addition, overhead squats are a great way to improve your mobility, if you can do a clean-grip overhead squat without the bar falling forward and you can front squat more than your best clean without your back rounding, consider your posture fit for purpose!
3. PERFECT THAT FIRST PULL
Due to the heavier weight used in the clean versus the snatch, a bad first pull will cause serious problems. During the first pull the shoulders should stay over the bar AND the back angle should remain the same. Often people mistakenly let those hips rise as soon as the bar moves.
Your knees only have to move fractionally to get out of the way of the bar as it passes the knees. Pushing your knees back switches off the legs and places the pressure on the back. The more pressure you can keep on the front of the foot, the more your legs will be primed to move into the extension.
4. MEET THE BAR
Ever found yourself pulling the bar so high and diving under the bar so fast that the bar comes crashing down onto your shoulders and crumbles you into a ball? Timing is very important during the clean and jerk. Meeting the bar just below parallel and “catching the bounce” out of the squat is essential to coming out of a heavy clean with ease.
The following can all improve this aspect of your lift:
- Hang Cleans
- Block Cleans
- Semi-Power Cleans (catching halfway and then squatting all the way down)
5. COMMIT, COMMIT, COMMIT!
You have to pull that bar with all your might! Use a strong hip drive and extension followed by a do-or-die rapid movement underneath the bar with the elbows up in full confidence. If you have any doubt, the weight will crush you!
Rehband elbow sleeves and wrist protection can be a great confidence booster here. It is absolutely vital that you commit completely to every clean. Even the tiniest shred of doubt must be swept from your mind as this will affect the way you are able to jump underneath the bar as you catch the weight. Protection, alongside the obvious physical benefits, can help to improve your confidence and consequently your lifts and progression.
The second part of this lift is the jerk. This requires speed, precision and great strength from both the lower and upper body. Learn more about Split Jerk Technique.
The Clean and Jerk, Snatch and Accessory Exercises will all help to develop your mobility, strength and motor patterns. They are all great ways to strengthen your upper body for general life as well.
Make sure that you always place optimal form at the top of your list of priorities when it comes to mastering these lifts. This in turn will improve your posture and proprioceptive abilities as well. Both of these classical Olympic lifts will also test and improve your athleticism and ability to generate power and speed in a technically effective manner. They are different from other more strength orientated exercises such as the overhead press in that you have to enable your full potential across a broader range of domains in order to complete each lift successfully.
This article is part of the Rehband Carry Yourself series, a complete guide to improving your upper body strength, mobility, posture and health.
This article will teach you everything you need to know about Split Jerk Technique. It will help you to improve your skills, make you more resistant to injury and ultimately give you a stronger upper body, allowing you to become a better athlete and more accomplished lifter. It will also give you helpful tips from top CrossFit™ and Rehband athletes Annie Thorisdottir and USA Weightlifter Mattie Rogers.
SPLIT JERK TECHNIQUE
In WODs we often see a preference of push/power jerk or even a “push press” over split jerks. When you have to face a heavy clean and jerk, the time spent mastering the split jerk may help you achieve those much-needed kilograms.
“Throwing heavy things overhead has always been one of my favourites. That moment in time where the bar becomes weightless and you need to make a decision – make or break, drop under or drop the bar. I think the suspense is what makes this so exciting and fun to work on.” Annie Thorisdottir
1. BODY POSITIONING: SPLIT JERK – NOT SPLIT SPLAT!
When someone tries a split jerk for the first time, it is often more of a foot splat, but it needs to be precise. Think about your body from a side view, there should be a nice straight line between the bar, shoulders and hips with an even distance between the feet. This allows your legs to take the weight rather than your lower back or joints.
Try these simple positioning cues:
- Is the shin of the front leg vertical?
- Is the back leg bent?
- Is the back foot on the toes and correctly aligned with the knee?
Aside from the legs, make sure that the shoulders and hips are directly underneath the bar when you receive the weight, this will make it feel light. Try to use the legs rather than the lower back.
Here is a helpful drill to try as well if you tend to catch your jerk too far forward.
2. PERFECT THE DRIVE
If you can drive the bar really high and in a straight line, then your recovery from the split will be even easier.
The Push Press is a fantastic exercise to work on the drive, however you must use the leg drive as much as possible by driving up onto the toes, and staying on the toes until the end of the press, this may be harder but it will be rewarding in the long run! In contrast, if your leg power is good but your bar path is off, power jerks are a great way to correct the bar path. Many athletes can save a bad Split Jerk but may be punching the bar incorrectly, using a combination of push press and power jerk can help solve the problem naturally.
3. RACK POSITION
Having a comfortable shelf on the shoulders for the bar will allow the dip and drive to be straight and powerful.
If you struggle to keep your chest or elbows up during the dip you may have to work on improving your thoracic mobility or loosening your lats and triceps. Alternatively, it may be postural strength, for this jerk dips with heavy weight which for 3 sets of 5 will help the athlete strengthen the dip posture. In addition, a common habit to watch out for is to compromise the upright position of the rack by using the arms too early. You must let the shoulders drive through the bar before your arms punch through.
Elbow sleeves can be a good addition here to help strengthen the upward movement of the bar during the split jerk.
4. SOUND IS IMPORTANT
A quiet or a ‘pitter-patter’ split jerk is usually an indication of the lifter being too slow or not giving the bar enough float in order to move the feet into the right position. At the top of the jerk drive the feet need to slide out as opposed to lifting up and out. Many people are slow because they try to lift the legs in an arc, as opposed to a skim across the service. Perfecting this will take time.
“You have to be willing to put in the work – whatever you are fighting for, it doesn’t happen without putting in work. Work is not always fun, but work that is hard will make what you are fighting for even sweeter when you reach that goal.” Annie Thorisdottir
5. GIVE IT TIME
It is common at the start to be able to push press more than you can split jerk. Split jerk refinement takes a lot of patience, but when it is perfected that jerk drive will become snappier. This will allow your well-crafted split to be ready to receive the weight BEFORE the weight starts falling and you will be able to slam that bar in triumph.
For those that struggle to feel stable in the split jerk you should try engaging in some single-leg strengthening exercises such as alternate leg lunges and overhead split squats. This will allow your well-crafted split to be ready to receive the weight BEFORE the weight starts falling, and you will be able to recover and complete the lift. If, however, after a year or so of persisting unsuccessfully with this method, you may have to settle for the power jerk and focus on that as your preferred method for the clean and jerk.
ROUTINE TO IMPROVE YOUR SPLIT JERK
A simple jerk routine would involve:
- 3 sets of 5 push press,
- 3 sets of 3 Power Jerk
- 3 sets of 1 split jerk
(move up in weight between each exercise)
This routine should be done apart from other overhead movements because you will find your shoulders pretty useless after all that work!
The Clean and Jerk, Snatch and Accessory Exercises will all help to develop your mobility, strength and motor patterns. They are all great ways to strengthen your upper body for general life as well.
Make sure that you always place optimal form at the top of your list of priorities when it comes to mastering these lifts. This in turn will improve your posture and proprioceptive abilities as well. Both of these classical Olympic lifts will also test and improve your athleticism and ability to generate power and speed in a technically effective manner. They are different from other more strength orientated exercises such as the overhead press in that you have to enable your full potential across a broader range of domains in order to complete each lift successfully.
EXPAND YOUR KNOWLEDGE
Improve your Olympic lifting by mastering the Power Clean, Hang Clean, Hang Power Clean and Push Jerk